Tutorial Tuesday- S'mores Trail Mix!

Tuesday, January 20, 2015

Hi everyone!! :) I've been super busy this past week, but I've still created my Tutorial Tuesday post for you all! Now, I don't know about you, but I LOVE s'mores. They're so gooey and yummy, and agh! I love them. (Tip- if you want to make them REALLY delicious, replace the Hershey's bar with a Reese's cup chopped up. Oh dear heavens, it is delicious!) But sometimes I don't have the time or energy to make a real s'more, or I may not have all of the ingredients. That's where S'mores Trail Mix comes in! It takes all of three minutes to make, and it's super delicious. You could even make a huge batch of it, put it in little baggies, and have the perfect snack when you're running out the door! I'll admit, this isn't the healthiest recipe, but I mean, we're talking about s'mores here. Unhealthiness is kind of implied. ;) Anyways, it's fast and delicious, so I'm super excited to share it with you all!

Step One: Get out your ingredients!

First up, we have Golden Grahams cereal! It's so crunchy and sweet and agh!
 Next up, you of course need some chocolate! I like to use milk chocolate chips, but if you want something other form of chocolate, it really doesn't matter. Chopped up candy bar, dark chocolate, semisweet, whatever you'd like!
And of course, marshmallows! How can you have s'mores without marshmallows? 

Step Two: Mix them all together!

Just mix them all together, and there you have it! A delicious s'mores trail mix! I probably put too many marshmallows into mine haha, but what can I say, I love them? :)

And that's it!! It's such a delicious, easy snack for those days when you don't have time for anything else. I hope that you enjoy it! Let me know what you think in the comments!

Tutorial Tuesday- Binder Covers!!!

Tuesday, January 13, 2015

Hi everyone! So, for today's Tutorial Tuesday post, I decided to show you how I make my binder covers. Since it's the beginning of a new semester, it's a perfect time to spice up those boring binders from last semester. After all, in my opinion, it's a lot easier to deal with having to look at those evil school supplies every day if they're pretty!!

Step One : Pick a background print!

So, what I like to do is to go to Google and type in, "_______ iPhone background. " In this case, I wanted a yellow chevron print, so I type in "Yellow Chevron iPhone background". iPhone backgrounds are the best to use because they're rectangular like a sheet of paper.

Step Two : Open Word and insert your image!

Step Three : Resize the Image


To do this, all you do is resize the margins so that they are at 0, and then drag the image out to take over the entire sheet of paper. :)

Step Four : Celebration!! :D

Woo hoo! You've gotten this far!! It took me a good hour to figure out how to do this my first time, but then again, I didn't have a tutorial to teach me! Anyways, now you have your pattern covering your screen, so congratulations!!! It should look something like this-

Step Five : Add your text

Now, you'll want to put the subject name! All that you have to do is create a text box and drag it where you'd like on the paper. Then, type your subject name.

But don't worry, it won't look this blah for long!!! Because....

Step Six : Cute-ify Your Cover!!!!

That's right ladies, time for the best part- making it look cute!!! :) I like to center the title, and then put it in a cute font. My favorite font on Word is Curlz MT. It's so cute and girly!!

Step Seven : Add some symbols for flair!

I like to add some of those cute copy-and-paste symbols on either side of the title. :) For this cover, I decided to go with flowers.

And, there you go! You have a cute binder cover! I like to make these for all of my subjects. :)

So, what do you think? It's super simple, and I love making my school supplies look nice. If you have any questions, just let me know in the comments!!!

~Grace Anne


Tutorial Tuesday- Sock Bun!!

Tuesday, January 6, 2015

Hello everyone!! Happy Tutorial Tuesday!! So, for my first tutorial, I decided to teach you all how I do a sock bun. :) For the longest time, I struggled with how to do a sock bun. There are MILLIONS of tutorials for them online, but what really works? I tried so many different tactics before finally finding one that worked best.


 Who knew that one little sock could cause so much trouble???????

So, in order for you guys to not go through all of the pain and suffering of trying a million different methods, I'll show you how I do one. :)


First, you put your hair in a high ponytail, wherever you'd like the bun to be. I typically use nude hair elastics, but I used colored so that you all could see them better. :)


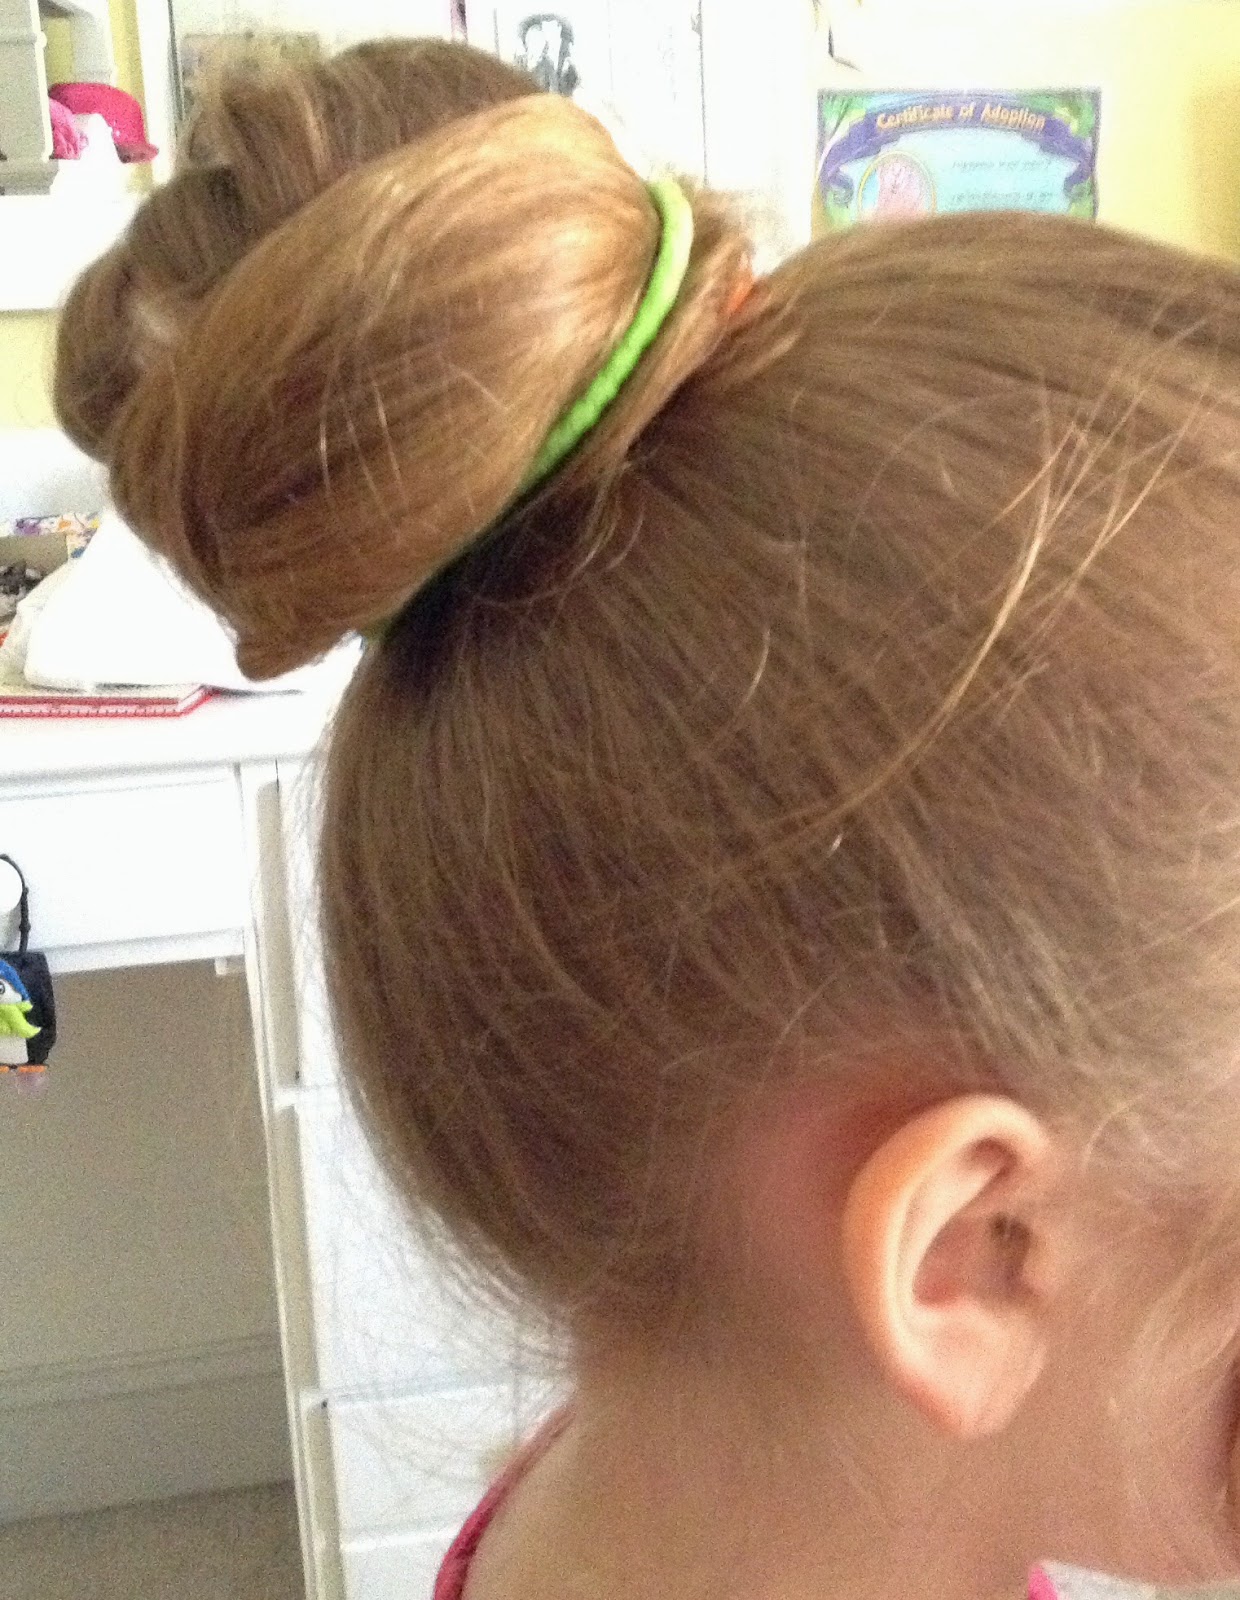
Next, you put the donut, or sock, through the ponytail and over the elastic.


After that, you basically fold the hair over the sock, and cinch it with another hair tie. The rest of the hair should dangle out.


You then gather the hair together and wrap it around the bun. Hold it in place with yet another hair tie.


I sometimes stop at the last step, but sometimes it's fun to put a fun hair wrap around the bun for a nice little POP of color. :) It's that simple! It only takes me about five minutes to do this one, so it's super simple. I hope that this helped you to learn how to create a sock bun! Let me know what you think in the comments!! :)


A DIY Costume!

Monday, October 20, 2014

So, what did y'all think of that teaser I posted yesterday? So, today I have the full costume for you all! I went to a Halloween event last night, and I wanted to create a costume instead of buying it. After looking at a bunch of ideas online, I decided to go for this look....
Hipster Snow White!!!!!
So, what do you think? This costume was sooo much fun! It was also super easy, which was a perk. All that it consisted of was-

-Red Ribbon ( you can't see it but it was in my hair )
-Royal blue top (Hollister)
-Yellow shorts (Target)
-Apple earrings (optional)
-Nerd Glasses
-Red Keds

It's that simple! Here's a close up of me being my crazy self, and you can see my makeup look-

This picture made me look sooooo pale!! I did pale makeup for Snow, BUT I'M NOT THAT WHITE!! Agh. So, for the makeup, I did-

-Pale foundation (used the Elf tone corrector!)
-Lots of mascara
-Blush
-BRIGHT red lipstick
-Gold eyeshadow

Again, super simple! So, what do you all think???

~Grace Anne


Cute and Easy Hairstyle!!

Tuesday, September 2, 2014


So, this hairstyle is SUPER easy, it only takes about five minutes and you're out the door! My hair's kind of curly today, can you tell? It's always somewhat wavy/curly, which is both a blessing and a curse, to be honest. Usually I straighten or curl it, but I was trying to be quick this morning. It also looks kind of dark in this photo, which is weird. I guess it's just the lighting. Anyways, so, here's how to achieve this look!! (I'm just putting a written tutorial in here because I couldn't exactly figure out how to get this on camera, it looked really weird. Plus, it's so simple that I'm sure you all can get it just like *that* !! I have faith in you girls!!!)

1. Part your hair whichever way you normally do. I always part mine on the right side.
2. Take the front section of your hair on whichever side of your hair is thicker. So, since I part my hair on the right side, I have more hair on the left side. 
3. Brush that section of hair back, and secure it with a few bobby pins. 
See how the bobby pins cross over each other? It's more secure that way. 

It's as easy as that!! Sorry if that was kind of confusing, I worked on this for ages but just can't seem to get it right. I hope that it was helpful! Comment if you need any more photos or explanation, I'm more than happy to help. Let me know what you guys think!! I would love some opinions!


Bobby Pin Power!!

Thursday, August 28, 2014

Aren't these cute? A sweet friend gave these to me, and I adore them! I love embellished bobby pins like these, they're a great accessory to add to a simple hairstyle to jazz it up a bit. Perfect for those school mornings where we're too late to do anything fancy hair-wise, but still want to look cute. Just add them to a braid or ponytail, and there you go! Adorable! I added them to a fishtail, and I love how they looked. :)
What do you guys think? Cute, huh? I think it's super cute! :) Do you guys like it? LMK what you think!

CopyRight Grace Anne Johnson 2024 © | Theme Designed By Hello Manhattan