Tutorial Tuesday- How to Reuse Old EOS Containers!

Tuesday, April 14, 2015

Hey everybody! I haven't done a Tutorial Tuesday in forever, just because they take a bit more time to put together than I usually have haha. ;) But I actually have one to share with you all today- how to reuse your old EOS containers! I don't know about you, but I'm obsessed with EOS. Thus, I end up with a lot of empty containers. And, being the hoarder that I am, I naturally want to reuse the containers! So, here's how I do it! :)

So, first off, supplies. You're going to need an EOS that you've finished, a plastic spoon, and paper towels.
You're also going to need wire cutters, preferable pink ones. ;) These somehow didn't make it into the supplies picture above :P
So, you have your lovely, old, flat EOS. It's sad. You can't use it anymore. Why does it even exist at this point? Shouldn't it magically regenerate? I think so.
 But, since it won't be a good little lip balm and regenerate, you have to reuse it. So you take your plastic spoon and scrape the top off.
Now, it should look something like this. You should be able to see the nice little pinwheel. Hello, pinwheel!
This next step isn't really required, but I feel like it kind of makes things easier. Using the end of the spoon, poke each little triangle inwards. It will get it off of the pinwheel somewhat, which will help you.
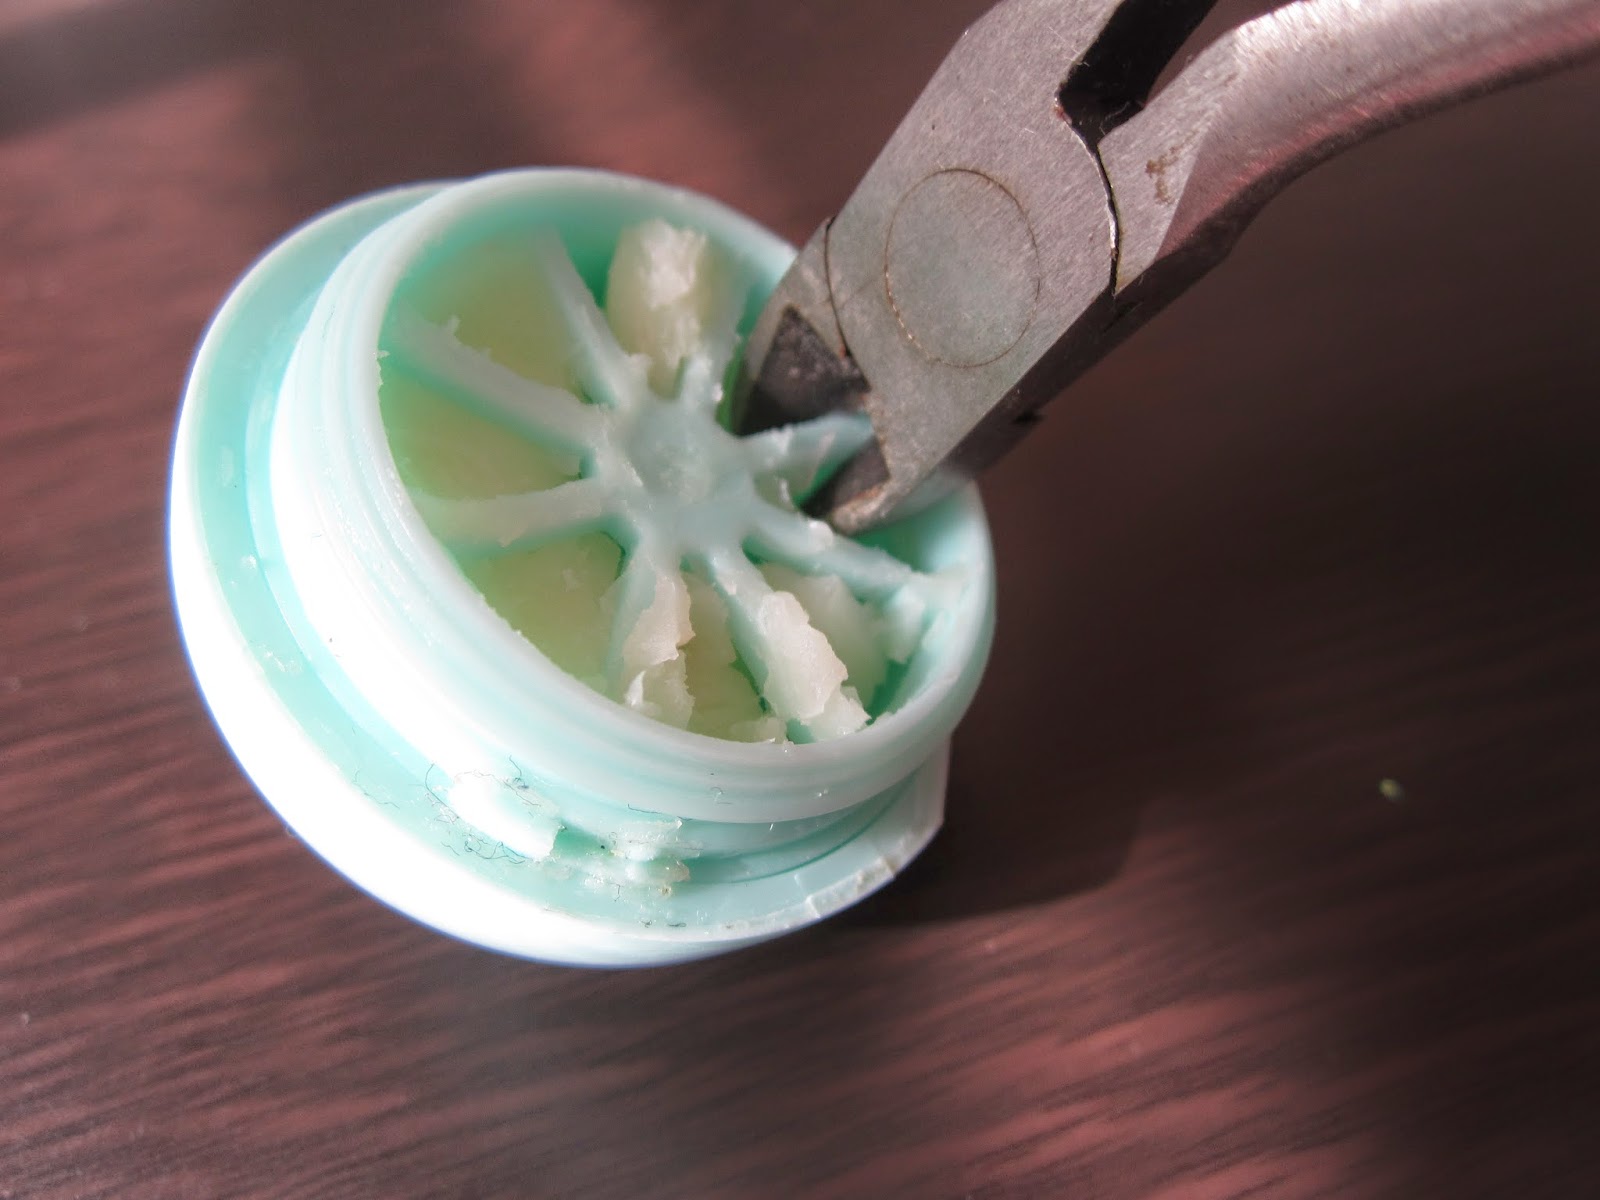
Next, you take the wire cutters and snip each little plastic piece as close to the end as possible. (Let me just say, this picture was not easy to take. At. All.)
Aaaaand, the pinwheel is out! I'm sorry, but I just think that it's adorable. XD I still want to figure out some way to reuse the pinwheel, but I can't come up with anything. Any ideas, readers??
So now, this is what it should look like on the inside.
Okay random little tangent here, you get little EOS chunks in the shape of a tiny piece of cake or a pizza slice! Yay! I just think it's super cute. XD Moving back on track...
Next, clean out the eos REALLY WELL. You don't want it to be all slimy and greasy when you use it.
Now that it's clean, you get to decorate it!!! I just took a grey sharpie and did polka dots, but you can really do whatever you want with it. Have fun!!!
And, you're done! :D You can really use this tiny container for whatever you want. I like to use it to hold my earrings when I travel- I can keep like, twenty pairs of studs inside! I was really shocked with how spacious they are. You can use them for other things too though, they're perfect to keep some quarters inside, or to keep stocked with Advil or aspirin in your purse.

I hope that you've enjoyed this Tutorial Tuesday post! Hopefully I'll get to do more of these soon. :) If you have anything to say, leave a comment below!


Tutorial Tuesday- How To Come Up With A Blog Post!

Tuesday, January 27, 2015

Hi everyone! So, before I start this post, I just wanted to note that I've done a whole month of Tutorial Tuesdays! So now I want to know- what did you think? Do you want to see more Tutorial Tuesday posts? Or did you not like them at all? Share your thoughts below, and I'd love if you'd also vote on the poll!
So, for today's Tutorial Tuesday, I'm doing a bit of an ironic topic-how to come up with a blog post! Seeing as this is something I struggle with myself, it's kind of funny that I'm trying to write about it, but I know that I'm not the only one with this problem! So, I thought, why not write on it? 

1. Figure out what you enjoy writing about

If you don't enjoy the topic, why write about it? Figure out what YOU like to write about. Whether it's books, fashion, DIY's, or food, figure out what you like!

2. Think of a way to put an interesting twist on it!

Do you like blogging about food? Show us those cupcakes that didn't turn out so well! Are you a fashion blogger? Take us along with you on your next shopping trip! Show us a bit more!

3. Try a new type of post!!

The internet is full of posts giving ideas for a blog post! Here are some of my favorites!

-Review something
-Do a vlog
-Show us your favorite products
-Tell us something about your life!
-Do a room tour
-Give us some organizational tips
-Trade blogs with a friend for the day
-Do a DIY
-Teach us something that you do well
-Tell us a funny story
-Show us your favorite app or website
-Introduce us to your pet 
-Post about your go-to look
-Tell us about a recent trip you took
-Write about your favorite childhood memory
-Show us how to make your favorite snack


Well, hopefully this post has given you a bit of inspiration! I'll have to look back at it next time I need some inspiration! ;) Remember to comment and let me know your thoughts on Tutorial Tuesday!

Tutorial Tuesday- S'mores Trail Mix!

Tuesday, January 20, 2015

Hi everyone!! :) I've been super busy this past week, but I've still created my Tutorial Tuesday post for you all! Now, I don't know about you, but I LOVE s'mores. They're so gooey and yummy, and agh! I love them. (Tip- if you want to make them REALLY delicious, replace the Hershey's bar with a Reese's cup chopped up. Oh dear heavens, it is delicious!) But sometimes I don't have the time or energy to make a real s'more, or I may not have all of the ingredients. That's where S'mores Trail Mix comes in! It takes all of three minutes to make, and it's super delicious. You could even make a huge batch of it, put it in little baggies, and have the perfect snack when you're running out the door! I'll admit, this isn't the healthiest recipe, but I mean, we're talking about s'mores here. Unhealthiness is kind of implied. ;) Anyways, it's fast and delicious, so I'm super excited to share it with you all!

Step One: Get out your ingredients!

First up, we have Golden Grahams cereal! It's so crunchy and sweet and agh!
 Next up, you of course need some chocolate! I like to use milk chocolate chips, but if you want something other form of chocolate, it really doesn't matter. Chopped up candy bar, dark chocolate, semisweet, whatever you'd like!
And of course, marshmallows! How can you have s'mores without marshmallows? 

Step Two: Mix them all together!

Just mix them all together, and there you have it! A delicious s'mores trail mix! I probably put too many marshmallows into mine haha, but what can I say, I love them? :)

And that's it!! It's such a delicious, easy snack for those days when you don't have time for anything else. I hope that you enjoy it! Let me know what you think in the comments!

Tutorial Tuesday- Binder Covers!!!

Tuesday, January 13, 2015

Hi everyone! So, for today's Tutorial Tuesday post, I decided to show you how I make my binder covers. Since it's the beginning of a new semester, it's a perfect time to spice up those boring binders from last semester. After all, in my opinion, it's a lot easier to deal with having to look at those evil school supplies every day if they're pretty!!

Step One : Pick a background print!

So, what I like to do is to go to Google and type in, "_______ iPhone background. " In this case, I wanted a yellow chevron print, so I type in "Yellow Chevron iPhone background". iPhone backgrounds are the best to use because they're rectangular like a sheet of paper.

Step Two : Open Word and insert your image!

Step Three : Resize the Image


To do this, all you do is resize the margins so that they are at 0, and then drag the image out to take over the entire sheet of paper. :)

Step Four : Celebration!! :D

Woo hoo! You've gotten this far!! It took me a good hour to figure out how to do this my first time, but then again, I didn't have a tutorial to teach me! Anyways, now you have your pattern covering your screen, so congratulations!!! It should look something like this-

Step Five : Add your text

Now, you'll want to put the subject name! All that you have to do is create a text box and drag it where you'd like on the paper. Then, type your subject name.

But don't worry, it won't look this blah for long!!! Because....

Step Six : Cute-ify Your Cover!!!!

That's right ladies, time for the best part- making it look cute!!! :) I like to center the title, and then put it in a cute font. My favorite font on Word is Curlz MT. It's so cute and girly!!

Step Seven : Add some symbols for flair!

I like to add some of those cute copy-and-paste symbols on either side of the title. :) For this cover, I decided to go with flowers.

And, there you go! You have a cute binder cover! I like to make these for all of my subjects. :)

So, what do you think? It's super simple, and I love making my school supplies look nice. If you have any questions, just let me know in the comments!!!

~Grace Anne


Happy January!!

Thursday, January 1, 2015

Happy January, everyone!! Wow, this is my first post of 2015!! So weird O.o I hope that you had a good New Year's Eve! I had a nice quiet night at home, spent watching movies, and then the ball drop in Times Square. It would be really fun to be there in Times Square, wouldn't it? I've never been, but I'd like to. Then again, when I was watching, they said that the bystanders had been waiting there for twelve hours. I'm not quite sure if I'd be willing to do that!
Have you made any New Year's resolutions? I need to make some for myself, but I'm really bad at keeping to them. I'll usually keep my resolutions for about a week, and then I forget about them entirely. I do have a New Year's resolution for Totally Graced!!! I resolve to post at least 2x a week. I can't guarantee that I'll be able to do this every week, but it's my goal. I'd like to post more than that, but hey, twice a week is a start!!
I also have something new that I'll be doing here at Totally Graced for the month of January- Tutorial Tuesdays!! Every Tuesday, I'll post a tutorial for a DIY, a beauty tutorial, or something else like that. If you all like it, I'll keep Tutorial Tuesdays up for the rest of the year! What do you think?
Anyways, with that piece of news out of the way, back to January. I've got to admit, it's not my favorite month. After the holidays, it's kind of a letdown. It's also super cold, and I don't like being cold haha. Oh well. I do like getting to curl up under a big blanket with a book and hot chocolate. I still won't mind it once it warms up again!! :):)
Well, that's all for now! I hope that you have a wonderful January, and thank you for reading! If you have anything to say, please comment below!! :) <3

~Grace Anne

CopyRight Grace Anne Johnson 2024 © | Theme Designed By Hello Manhattan